How To Attach Remington Pole Saw: Step-by-Step Guide
Key Highlights
- The Remington RM1025P is a versatile electric chain that can also be converted into a pole saw for reaching high branches without a ladder.
- It a powerful 8-amp motor and a 10-inch cutting bar and chain, making it suitable for small to medium-sized cutting tasks.
- The saw is equipped with a push-button oiler for lubrication and a tool-less chain tensioning system for easy adjustments.
- Safety precautions should always be followed when using the pole saw, including wearing protective gear and securing branches properly.
- The step-by-step assembly guide will help you attach the saw to the pole, secure the chain and bar, and adjust the tension for optimal performance.
Introduction
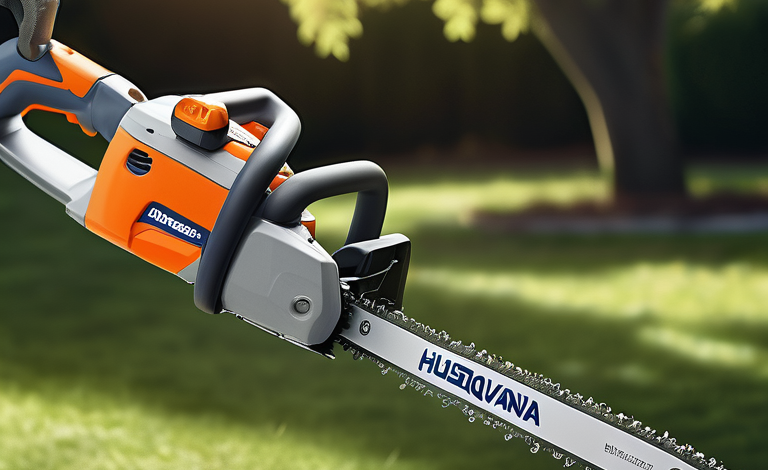
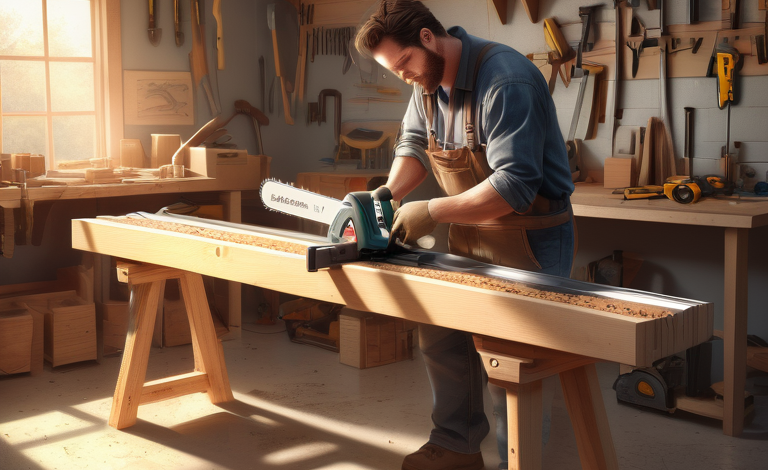
If you’re looking for a reliable and efficient tool for your outdoor cutting needs, the Remington Pole Saw is an excellent choice. This electric chainsaw offers a unique 2-in-1 functionality, allowing you to easily switch between a standard chainsaw and a pole saw. With its powerful motor and convenient features, the Remington Pole Saw makes trimming branches and pruning trees a breeze.
One of the standout features of the Remington Pole Saw is its versatility. It can be used as a chainsaw for cutting branches close to the ground, or as a pole saw for reaching high tree branches without the need for a ladder. This makes it ideal for a range of outdoor tasks, from trimming overgrown hedges to pruning tall trees.
Safety is a top priority when it comes to using any power tool, and the Remington Pole Saw is no exception. It comes with several safety features to ensure a secure and hassle-free cutting experience. Additionally, the saw is designed to be easy to use and maintain, making it suitable for both beginners and experienced users.
In this step-by-step guide, we will walk you through the process of attaching your Remington Pole Saw to the pole, securing the chain and bar, and adjusting the tension for optimal performance. By following these instructions, you’ll be able to safely and effectively use your pole saw for all your outdoor cutting needs.
Understanding Your Remington Pole Saw
Before you start assembling your Remington Pole Saw, it’s important to understand its key features and components. This will help you become familiar with the tool and ensure that you assemble it correctly.
Key Features and Components
The Remington Pole Saw is equipped with several key features and components that contribute to its performance and functionality. Understanding these features will help you make the most of your tool.
One important component of the pole saw is the roller bearing. This component is responsible for ensuring smooth operation of the chain and bar, reducing friction and prolonging the life of the saw. It is essential to keep the roller bearing clean and well-lubricated to maintain optimal performance.
Another important feature is the chain adjuster. This feature allows you to easily tighten or loosen the chain to achieve the desired tension. Proper chain tension is crucial for safe and efficient cutting. The Remington Pole Saw is equipped with a tool-less chain tensioning system, making it quick and easy to adjust the tension as needed.
By familiarizing yourself with the roller bearing and chain adjuster, you’ll be able to properly maintain and adjust your pole saw for optimal performance.
Safety Precautions Before Use
Before you start using your Remington Pole Saw, it’s important to take some safety precautions. These precautions will help ensure your safety and the safety of those around you.
First and foremost, always wear the appropriate safety gear when operating the pole saw. This includes safety glasses, ear protection, and sturdy gloves. Additionally, make sure to wear long sleeves and long pants to protect your skin from debris and scratches.
Before using the pole saw, inspect it for any damage or wear. Check the chain for sharpness and ensure that all components are in good working condition. If you notice any issues, contact the manufacturer or a professional for assistance.
When using the pole saw, always maintain a firm grip on the handle and keep both feet on the ground. Avoid using the pole saw in wet or slippery conditions, as this can increase the risk of accidents.
By following these safety precautions, you can use your Remington Pole Saw with confidence and peace of mind.
Preparing for Assembly
Before you start assembling your Remington Pole Saw, it’s important to gather all the necessary tools and familiarize yourself with the parts. This will ensure a smooth and efficient assembly process.
Tools Needed for Assembly
To assemble your Remington Pole Saw, you will need the following tools:
- Screwdriver
- Wrench
- Allen wrench (if required by your specific model)
Having these tools on hand will make the assembly process much easier. Additionally, make sure you have a clean and well-lit workspace to work in.
It’s also a good idea to read through the instruction manual provided by the manufacturer. This will give you a better understanding of the assembly process and any specific instructions or precautions to follow.
By gathering the necessary tools and familiarizing yourself with the parts and instructions, you’ll be well-prepared to assemble your Remington Pole Saw.
Unboxing and Parts Verification
When you receive your Remington Pole Saw, it’s important to carefully unbox it and verify that all the necessary parts are included. This will ensure that you have everything you need to assemble the saw correctly.
Start by opening the box and removing all the contents. Lay them out on a clean, flat surface and compare them to the parts list provided in the instruction manual. This will help you identify any missing or damaged parts.
Here is a text table listing the key parts of the Remington Pole Saw:
|
Part Name |
Quantity |
|
Pole Saw |
1 |
|
Extension Pole |
1 |
|
Chain and Bar |
1 |
|
Screws and Bolts |
Varies |
|
Handle |
1 |
|
Chain Adjuster |
1 |
By verifying the parts before assembly, you can ensure that you have everything you need to successfully attach your Remington Pole Saw to the pole.
Step-by-Step Assembly Guide
Now that you have gathered the necessary tools and verified the parts, it’s time to start the assembly process. Follow this step-by-step guide to attach your Remington Pole Saw to the pole, secure the chain and bar, and adjust the tension for optimal performance.
Attaching the Saw to the Pole
The first step in the assembly process is attaching the saw to the pole. This step is crucial for ensuring that the pole saw is securely attached and will not come loose during use.
Start by aligning the holes in the saw bracket with the holes in the pole. Insert the screws provided into the holes and tighten them with a screwdriver or wrench. Make sure the screws are securely tightened to prevent any movement or wobbling.
Securing the Chain and Bar
Once you have attached the saw to the pole, the next step is to secure the chain and bar. This will ensure that the chain stays in place while cutting and prevents any accidents or damage.
To secure the chain and bar, locate the chain adjuster on the side of the saw. Use a screwdriver or wrench to adjust the tension of the chain. The chain should be tight enough to stay in place but loose enough to move freely. Refer to the instruction manual for specific instructions on how to adjust the chain tension.
Adjusting Tension for Optimal Performance
Proper chain tension is crucial for optimal performance and safe operation of your Remington Pole Saw. Adjusting the tension ensures that the chain moves smoothly and efficiently while cutting.
To adjust the tension, use the chain adjuster located on the side of the saw. Turn the adjuster clockwise to tighten the chain or counterclockwise to loosen it. The chain should have a slight amount of give but should not sag or be too tight.
It’s important to regularly check and adjust the chain tension as needed. Over time, the chain may stretch or loosen, affecting the saw’s performance. By maintaining proper chain tension, you can ensure that your Remington Pole Saw operates at its best.
Powering Up Your Pole Saw
Once you have assembled your Remington Pole Saw, the next step is to power it up. The method of powering the saw will depend on whether it is a cordless or corded model.
Battery Installation and Maintenance (for cordless models)
If you have a cordless Remington Pole Saw, the first step is to install the battery. Follow the instructions provided by the manufacturer to properly insert the battery into the saw.
It’s important to regularly maintain the battery to ensure optimal performance. This includes charging the battery fully before use and storing it in a cool, dry place when not in use. Refer to the instruction manual for specific guidelines on battery maintenance.
Connecting to Power Source (for corded models)
For corded Remington Pole Saws, the next step is to connect the saw to a power source. Make sure you have a suitable outdoor extension cord that is rated for the power requirements of the saw.
Plug one end of the extension cord into the power outlet and the other end into the saw. Make sure the connection is secure and that the cord is positioned away from the cutting area to prevent accidents.
Always follow the manufacturer’s instructions and safety guidelines when connecting your Remington Pole Saw to a power source.
Testing the Pole Saw
After assembling and powering up your Remington Pole Saw, it’s important to conduct a safety check and perform a test cut to ensure everything is functioning correctly.
Conducting a Safety Check
Before using the pole saw, take a moment to conduct a safety check. Inspect the saw for any loose or damaged parts, and ensure that all safety features are working properly. Check the chain tension and make any necessary adjustments.
First Cut and Adjustments
Once you have completed the safety check, it’s time to make your first cut. Choose a small branch or limb to test the cutting performance of the saw.
Hold the pole saw firmly with both hands and position the chain against the branch. Apply gentle pressure and let the saw do the work. If the saw is not cutting smoothly or the chain is slipping, make adjustments to the chain tension as needed.
Continue making test cuts and adjusting the chain tension until you are satisfied with the performance of your Remington Pole Saw.
Maintenance and Storage
Proper maintenance and storage of your Remington Pole Saw will help prolong its lifespan and ensure optimal performance.
Cleaning After Use
After each use, it’s important to clean your Remington Pole Saw to remove any debris or sawdust that may have accumulated. Use a soft brush or cloth to wipe down the saw and remove any buildup.
Storing Your Pole Saw Safely
When not in use, it’s important to store your Remington Pole Saw safely. Make sure the saw is clean and dry before storing it. Store it in a cool, dry place away from direct sunlight and extreme temperatures.
Troubleshooting Common Issues
Despite its high-quality construction and performance, the Remington Pole Saw may encounter some common issues. Knowing how to troubleshoot these issues will help you resolve them quickly and get back to your cutting tasks.
Chain Slippage and Solutions
One common issue that pole saw users may encounter is chain slippage. If the chain keeps slipping off the bar during use, it can affect the saw’s performance and safety.
To address chain slippage, start by checking the chain tension. Adjust the tension as needed to ensure it is properly tightened. If the chain continues to slip, check for any damage or wear on the chain or bar. If necessary, replace the chain or bar with new ones.
Power Problems and How to Fix Them
Another common issue that users may experience is power problems. If the pole saw won’t start or loses power while in use, there are a few troubleshooting steps you can take.
First, check the power source for corded models and ensure that the saw is properly connected. If using a battery-powered model, make sure the battery is fully charged and securely installed. If the power problem persists, check the power cord or the battery for any damage or defects. If necessary, replace the power cord or battery.
Enhancing Your Pole Saw Experience
To further enhance your Remington Pole Saw experience, consider using recommended accessories and following tips for efficient cutting.
Recommended Accessories
There are several accessories available for the Remington Pole Saw that can enhance its versatility and performance. Some recommended accessories include:
- Pole saw extension: This allows you to reach even higher branches without the need for a ladder.
- Bar and chain oil: Proper lubrication is essential for smooth cutting performance. Using a high-quality bar and chain oil will help prolong the life of your saw.
- Replacement chain: Having a spare chain on hand is always a good idea in case the original chain becomes damaged or dull.
Tips for Efficient Cutting
To make the most of your Remington Pole Saw, consider the following tips for efficient cutting:
- Start with smaller branches: Begin with smaller branches to get a feel for the saw’s cutting performance before moving on to larger ones.
- Use the entire length of the bar: Utilize the full length of the cutting bar to make efficient and controlled cuts.
- Let the saw do the work: Apply gentle pressure and let the saw’s cutting power do the work. Avoid forcing the saw or using excessive force.
- Maintain proper chain tension: Regularly check and adjust the chain tension to ensure optimal cutting performance.
By following these tips and using recommended accessories, you can enhance your Remington Pole Saw experience and achieve efficient and precise cutting results.
Conclusion
In conclusion, mastering the assembly of your Remington Pole Saw is crucial for safe and efficient operation. By carefully following the step-by-step guide and safety precautions outlined in this blog, you can ensure a smooth setup process. Remember to prioritize safety at all times, whether you are attaching the saw to the pole, securing the chain, or adjusting tension. Proper maintenance and storage practices will prolong the lifespan of your pole saw, enhancing your cutting experience. By equipping yourself with the recommended accessories and efficiency tips, you can elevate your pole saw usage to new heights. Happy sawing!
Frequently Asked Questions
How do I replace the chain on my Remington Pole Saw?
To replace the chain on your Remington Pole Saw, follow these steps:
- Loosen the chain tension.
- Remove the bar and old chain.
- Install the new chain onto the bar.
- Reattach the bar and adjust the chain tension.
Can I extend the length of my pole saw?
Yes, you can extend the length of your Remington Pole Saw by attaching a pole saw extension. This will allow you to reach higher branches without the need for a ladder.
What should I do if my pole saw won’t start?
If your Remington Pole Saw won’t start, check the power source (corded models) or battery (cordless models). Ensure that the saw is properly connected and that the power switch is in the “on” position. If the problem persists, refer to the troubleshooting section in the instruction manual or contact customer support.
How do you attach a pole saw?
To attach a Remington Pole Saw to the pole, align the holes in the saw bracket with the holes in the pole. Insert the screws provided and tighten them securely.
How do you adjust the chain on a Remington pole saw?
To adjust the chain on a Remington Pole Saw, locate the chain adjuster on the side of the saw. Use a screwdriver or wrench to adjust the tension by turning the adjuster clockwise to tighten the chain or counterclockwise to loosen it.
What are the steps to attach a Remington pole saw to a pole?
To attach a Remington Pole Saw to a pole, follow these steps:
- Align the holes in the saw bracket with the holes in the pole.
- Insert the screws provided and tighten them securely.
- Check the tightness of the connection and make any necessary adjustments.
Any way to take apart pole saw pieces? : r/ryobi
Yes, there are ways to take apart pole saw pieces. You can refer to online forums or discussion boards like r/ryobi for specific advice on disassembling and maintaining your pole saw.
What is a pole saw?
A pole saw is a type of chainsaw that is specifically designed for cutting tree branches and limbs in hard-to-reach areas. It features a long pole or extension that allows users to safely reach high branches without the need for a ladder.
Are there any specific tools required to attach a Remington pole saw to a pole?
To attach a Remington Pole Saw to a pole, you will need a screwdriver and potentially a wrench or an Allen wrench, depending on your specific model. These tools are required to securely attach the saw bracket to the pole.
What safety precautions should be taken when attaching a Remington pole saw to a pole?
When attaching a Remington Pole Saw to a pole, it’s important to follow these safety precautions:
- Ensure the saw is turned off and disconnected from the power source.
- Wear appropriate safety gear, including safety glasses, ear protection, and gloves.
- Securely attach the saw to the pole and check for any loose or damaged parts before use.

