Black and Decker Pole Saw Chain Replacement Guide
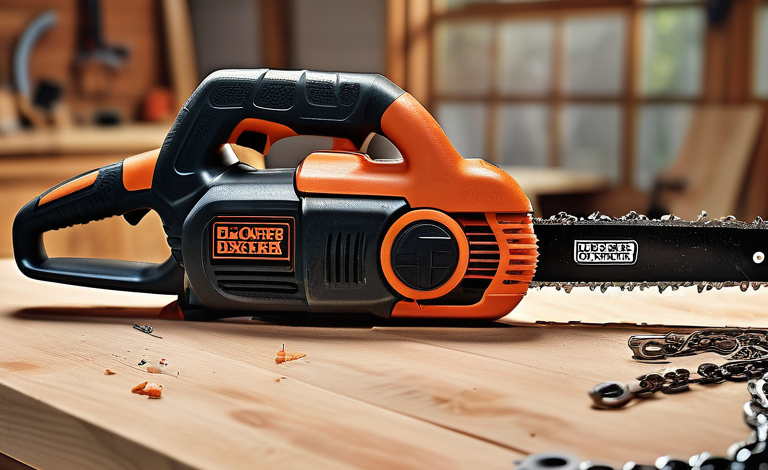
Key Highlights
- Proper maintenance of your Black and Decker pole saw chain is essential for optimal performance
- Identifying the correct replacement chain for your model is crucial for a successful replacement
- Following safety precautions is important when replacing the chain on your pole saw
- Gathering the necessary tools and materials before starting the replacement process will save you time and frustration
- A step-by-step guide will help you remove the old chain and install the new one correctly
Introduction
Welcome to our Black and Decker Pole Saw Chain Replacement Guide. If you own a Black and Decker pole saw, you know how important it is to keep the saw chain in good condition for efficient cutting. Over time, the chain may become dull or damaged, and replacing it is a necessary maintenance task. In this guide, we will provide you with all the information you need to successfully replace the chain on your Black and Decker pole saw.
Replacing the chain on your pole saw is a relatively simple process that can be done at home with the right tools and materials. By following the steps outlined in this guide, you can ensure that your pole saw continues to perform at its best. We will also provide you with important safety precautions to follow during the chain replacement process.
Understanding Your Black and Decker Pole Saw
Before we dive into the chain replacement process, it’s important to understand the basics of your Black and Decker pole saw. A pole saw is a type of chainsaw that is attached to a long pole, allowing you to reach high branches and trim them safely from the ground. Black and Decker is a trusted brand known for its high-quality power tools, and their pole saws are no exception. Now, let’s move on to identifying the model of your pole saw before proceeding with the chain replacement.
Identifying the Model Before Replacement
Before you start the chain replacement process, it is crucial to identify the model of your Black and Decker pole saw. Different models may require different replacement chains, so it’s important to ensure you have the correct chain for your specific model. To identify the model, you can check the label or sticker on the pole saw itself. The model number is usually located on the handle or the body of the saw. Once you have identified the model, you can proceed with purchasing the correct replacement chain.
Safety Precautions for Chain Replacement
Before you begin the chain replacement process, it is essential to prioritize safety. Chainsaws can be dangerous tools, and taking the necessary precautions will help prevent accidents and injuries. Here are some important safety measures to follow:
- Wear protective gear, including safety glasses, gloves, and ear protection, to protect yourself from flying debris and noise.
- Ensure the pole saw is disconnected from the power source to prevent accidental activation.
- Keep bystanders at a safe distance while you are working.
- Use a stable and secure surface to work on, such as a workbench or sturdy table.
- Familiarize yourself with the pole saw’s safety features and operation manual before starting.
By following these safety precautions, you can have a safe and successful chain replacement experience.
Tools and Materials Needed for Chain Replacement
To replace the chain on your Black and Decker pole saw, you will need a few tools and materials. Gathering these items before you start the replacement process will save you time and ensure a smooth workflow. Here are the tools and materials you will need:
- Replacement chain: Make sure you have the correct replacement chain for your model of pole saw.
- Screwdriver: You may need a screwdriver to remove the chain guard and other components.
- Wrench: Depending on your pole saw model, you may need a wrench to loosen and tighten bolts.
- Cleaning brush: A small brush will help you clean any debris or dirt from the pole saw.
- Lubricating oil: It’s important to lubricate the chain regularly for smooth operation.
Having these tools and materials ready will make the chain replacement process much easier and more efficient.
List of Required Tools
Before you start replacing the chain on your Black and Decker pole saw, make sure you have the following tools on hand:
- Screwdriver: This will be used to remove the chain guard and access the chain.
- Wrench: Depending on your pole saw model, you may need a wrench to loosen and tighten bolts.
- Cleaning brush: A small brush will help you clean any debris or dirt from the pole saw and the chain.
- Lubricating oil: It’s important to lubricate the chain regularly for smooth operation. Have some lubricating oil ready for this purpose.
By having these tools readily available, you can ensure a smooth and efficient chain replacement process.
Choosing the Right Replacement Chain
Choosing the right replacement chain for your Black and Decker pole saw is crucial for optimal cutting performance. There are various types of replacement chains available, such as the Opuladuo 2PC 8 Inch Polesaw Chain, that can deliver quickly and efficiently. It’s important to select the one that matches your pole saw model and meets your cutting needs. Some popular replacement chain brands include Oregon’s AdvanceCut 91PX saw chain, known for its low-vibration and low-kickback design. The Chamfer Chisel cutters feature twin cutting corners for excellent performance, and the bumper drive link and depth gauge design offer reduced kickback and strong cutting performance. When purchasing a replacement chain, make sure to check the specifications and compatibility with your pole saw model. It’s also a good idea to read customer reviews and ratings to ensure that you are selecting a reliable and durable chainsaw chain.
Step-by-Step Guide to Removing the Old Chain
Now that you have gathered the necessary tools and materials, it’s time to remove the old chain from your Black and Decker pole saw. Follow this step-by-step guide to ensure a smooth and successful removal process:
Step 1: Disconnect the Saw from Power Source
First and foremost, ensure that the pole saw is disconnected from its power source. This will prevent any accidental activation or potential injuries during the chain removal process.
Step 2: Removing the Chain Guard
Using a screwdriver, carefully remove the chain guard from the pole saw. This will give you access to the chain for removal.
Step 3: Releasing the Tension and Removing the Old Chain
Next, locate the tension adjustment screw or knob on the pole saw. Loosen the tension by turning the screw or knob counterclockwise. This will release the tension on the old chain. Once the tension is released, carefully remove the old chain from the guide bar and sprocket.
By following these steps, you can successfully remove the old chain from your Black and Decker pole saw.
Disconnecting the Saw from Power Source
Before you begin the chain removal process, it is crucial to disconnect the pole saw from its power source. This step is essential to prevent any accidental activation of the saw and to ensure your safety. Here are the steps to disconnect your pole saw from its power source:
- Turn off the pole saw: If the pole saw is running, turn it off by pressing the power button or switch.
- Unplug the power cord: If your pole saw is corded, unplug it from the power outlet. This will ensure that there is no electricity flowing to the saw.
- Remove the battery: If your pole saw is battery-powered, remove the battery from the saw. This will prevent any accidental activation while you are working on the chain.
By following these steps, you can safely disconnect your pole saw from its power source before starting the chain replacement process.
Removing the Chain Guard
To access the chain for removal, you will need to remove the chain guard on your pole saw. The chain guard is a protective cover that covers the chain and guide bar. Here’s how you can remove the chain guard:
- Locate the screws: The chain guard is usually held in place by screws. Locate the screws on the side or bottom of the chain guard.
- Unscrew the screws: Using a screwdriver, carefully unscrew the screws that are holding the chain guard in place. Make sure to keep track of the screws so you don’t lose them.
- Remove the chain guard: Once the screws are removed, you can easily lift off the chain guard from the pole saw.
By following these steps, you can remove the chain guard and gain access to the chain for removal.
Releasing the Tension and Removing the Old Chain
After removing the chain guard, the next step is to release the tension on the old chain and remove it from the guide bar and sprocket. Here’s how you can do it:
- Locate the tension adjustment screw or knob: The tension adjustment screw or knob is usually located near the guide bar. It allows you to adjust the tension on the chain.
- Loosen the tension: Using the appropriate tool, such as a screwdriver or wrench, turn the tension adjustment screw or knob counterclockwise to loosen the tension on the chain. This will make it easier to remove the old chain.
- Remove the old chain: Once the tension is released, carefully lift off the old chain from the guide bar and sprocket. Ensure that you keep track of any small parts or components that may come off with the chain.
By following these steps, you can successfully release the tension and remove the old chain from your Black and Decker pole saw.
Installing the New Chain
Now that you have removed the old chain, it’s time to install the new chain on your Black and Decker pole saw. Installing a new chain will ensure optimal cutting performance and extend the life of your pole saw. Follow these steps to properly install the new chain:
Step 1: Placing the New Chain Correctly
Align the new chain with the guide bar, ensuring that the cutting teeth are facing the correct direction. The chain should sit snugly on the guide bar without any slack.
Step 2: Adjusting the Tension on the New Chain
Using the tension adjustment screw or knob, tighten the tension on the new chain. The chain should be taut, but not too tight. Refer to your pole saw’s manual for the correct tension specifications.
Step 3: Reattaching the Chain Guard
Carefully reattach the chain guard, ensuring that it is securely fastened in place.
By following these steps, you can successfully install the new chain on your Black and Decker pole saw.
Placing the New Chain Correctly
When installing the new chain on your Black and Decker pole saw, is important to ensure that it is placed correctly for optimal cutting performance. Here’s how you can properly place the new chain on your pole saw:
- Align the chain with the guide bar: Lay the new chain on the guide bar, ensuring that the cutting teeth are facing the correct direction. The cutting teeth should be facing away from you when you hold the pole saw.
- Place the chain in the groove: Gently push the chain into the groove on the guide bar, making sure that it sits snugly and evenly.
- Check for proper placement: Once the chain is in the groove, check that it is aligned with the sprocket at the end of the guide bar. The chain should be positioned correctly to ensure smooth operation.
By following these steps, you can ensure that the new chain is placed correctly on your Black and Decker pole saw.
Adjusting the Tension on the New Chain
After placing the new chain on your Black and Decker pole saw, it is important to adjust the tension to ensure optimal cutting performance. Here’s how you can adjust the tension on the new chain:
- Locate the tension adjustment screw or knob: The tension adjustment screw or knob is usually located near the guide bar. It allows you to adjust the tension on the chain.
- Tighten the tension: Using the appropriate tool, such as a screwdriver or wrench, turn the tension adjustment screw or knob clockwise to tighten the tension on the chain. The chain should be taut, but not too tight. Refer to your pole saw’s manual for the correct tension specifications.
- Check the tension: Once you have tightened the tension, check that the chain is properly tensioned by pulling up on the chain at the middle of the guide bar. The chain should lift slightly, but not come off the guide bar.
By following these steps, you can adjust the tension on the new chain to ensure optimal cutting performance.
Reattaching the Chain Guard
After installing the new chain and adjusting the tension, the next step is to reattach the chain guard on your Black and Decker pole saw. The chain guard is a protective cover that helps prevent contact with the chain during operation. Here’s how you can reattach the chain guard:
- Align the chain guard: Hold the chain guard in position and align it with the screw holes on the pole saw. Make sure that it is oriented correctly and sits flush against the pole saw body.
- Insert the screws: Insert the screws into the screw holes on the chain guard and tighten them securely. Use a screwdriver or the appropriate tool to ensure a snug fit.
- Check for proper attachment: Once the screws are tightened, check that the chain guard is securely attached and does not move or wobble.
By following these steps, you can successfully reattach the chain guard on your Black and Decker pole saw.
Post-Replacement Checks
After replacing the chain on your Black and Decker pole saw, it’s important to perform some post-replacement checks to ensure that everything is in proper working order. Here are two key checks to perform:
- Ensuring Proper Chain Tension: Check the tension of the new chain to ensure that it is properly tensioned. The chain should be taut, but not too tight. It should lift slightly when pulled up at the middle of the guide bar.
- Test Cutting for Accuracy: Test the cutting performance of the pole saw with the new chain. Ensure that the saw cuts smoothly and accurately through branches.
By performing post-replacement checks, you can ensure that the chain replacement was successful and that your Black and Decker pole saw is ready for use.
Ensuring Proper Chain Tension
After replacing the chain on your Black and Decker pole saw, it is important to ensure that it is properly tensioned for optimal cutting performance. Here’s how you can check the tension of the new chain:
- Pull up on the chain: Hold the pole saw securely and pull up on the chain at the middle of the guide bar. The chain should lift slightly, but not come off the guide bar.
- Check for proper tightness: The chain should be taut, but not too tight. It should have a little bit of give when pulled up, but not sag or droop excessively.
- Adjust the tension if needed: If the chain is too loose or too tight, use the tension adjustment screw or knob to make the necessary adjustments. Refer to your pole saw’s manual for the correct tension specifications.
By ensuring the proper tension of the chain, you can optimize the cutting performance of your Black and Decker pole saw.
Test Cutting for Accuracy
Once you have replaced the chain on your Black and Decker pole saw, it’s important to test the cutting performance for accuracy. This will ensure that the new chain is properly installed and adjusted. Here’s how you can test the cutting performance:
- Select a suitable branch: Choose a branch of appropriate size and thickness for testing.
- Position the pole saw: Hold the pole saw securely and position the chain near the branch to be cut.
- Engage the chain and make the cut: Activate the pole saw and guide the chain smoothly through the branch. Ensure that the cut is clean and accurate.
By testing the cutting performance, you can ensure that the new chain is functioning correctly and cutting branches with precision.
Maintenance Tips for Longer Chain Life
Proper maintenance of your Black and Decker pole saw chain is crucial for ensuring its longevity and optimal performance. Here are two key maintenance tips to help extend the life of your chain:
- Regular Cleaning and Lubrication: Clean the chain and guide bar regularly to remove debris and dirt. Apply lubricating oil to the chain to reduce friction and prevent premature wear.
- Checking for Wear and Tear: Regularly inspect the chain for signs of wear and tear. Replace the chain if you notice any broken or damaged links, dull cutting teeth, or excessive stretching.
By following these maintenance tips, you can ensure a longer life for your Black and Decker pole saw chain.
Regular Cleaning and Lubrication
Regular cleaning and lubrication are essential for maintaining the longevity and performance of your Black and Decker pole saw chain. Here’s how you can keep your chain clean and properly lubricated:
- Cleaning the chain: After each use, clean the chain with a small brush to remove debris, dirt, and resin. This will help prevent the chain from clogging and reduce the risk of premature wear.
- Lubricating the chain: Apply lubricating oil to the chain, ensuring that all the links are coated. This will reduce friction and heat buildup, allowing the chain to run smoothly and prevent premature wear.
By regularly cleaning and lubricating your pole saw chain, you can extend its life and ensure optimal cutting performance.
Checking for Wear and Tear
Regularly checking your Black and Decker pole saw chain for signs of wear and tear is crucial for maintaining its performance and safety. Here’s what you should look for:
- Broken or damaged links: Inspect the chain for any broken or damaged links. If you notice any, it’s important to replace the chain immediately.
- Dull cutting teeth: Check the cutting teeth of the chain for signs of dullness. Dull teeth can result in inefficient cutting and increased strain on the motor. Sharpen the teeth or replace the chain if necessary.
- Excessive stretching: Over time, chains can stretch due to wear and tear. If you notice that the chain is loose or has excessive sagging, it’s time to replace it.
By regularly checking for wear and tear, you can ensure the safety and longevity of your Black and Decker pole saw chain.
Troubleshooting Common Issues After Replacement
Occasionally, you may encounter some issues after replacing the chain on your Black and Decker pole saw. Here are two common issues and their possible solutions:
- Chain Slipping Off the Bar: If the chain keeps slipping off the guide bar, it may be due to improper tension or a worn-out bar. Adjust the tension of the chain or replace the guide bar if necessary.
- Chain Cutting Inefficiently: If the chain is not cutting efficiently, it may be due to dull cutting teeth or improper tension. Sharpen the teeth or adjust the tension to improve cutting performance.
By troubleshooting these common issues, you can address them promptly and ensure the smooth operation of your pole saw.
Chain Slipping Off the Bar
One common issue that you may encounter after replacing the chain on your Black and Decker pole saw is the chain slipping off the guide bar. This can be frustrating and can affect the cutting performance of your pole saw. Here are some possible causes and solutions for this issue:
- Improper chain tension: If the chain is too loose, it may slip off the guide bar during operation. Adjust the tension of the chain according to the manufacturer’s instructions to ensure it is properly tensioned.
- Worn-out guide bar: Over time, the guide bar may become worn or damaged, causing the chain to slip off. Inspect the guide bar for any signs of wear or damage. If necessary, replace the guide bar with a new one.
By addressing these potential causes, you can prevent the chain from slipping off the guide bar and ensure smooth and efficient cutting.
Chain Cutting Inefficiently
Another common issue that you may encounter after replacing the chain on your Black and Decker pole saw is inefficient cutting. If the chain is not cutting as effectively as it should, here are some possible causes and solutions:
- Dull cutting teeth: Over time, the cutting teeth on the chain can become dull, leading to inefficient cutting performance. Sharpen the teeth using a chainsaw file or replace the chain with a new one if necessary.
- Improper chain tension: If the chain is too tight or too loose, it may not cut efficiently. Adjust the tension of the chain according to the manufacturer’s instructions to ensure it is properly tensioned.
By addressing these potential causes, you can improve the cutting performance of your Black and Decker pole saw.
Conclusion
In conclusion, maintaining your Black and Decker pole saw chain is crucial for efficient cutting and safety. Understanding the model, following safety precautions, and selecting the right replacement chain are key steps. By carefully removing and installing the new chain, adjusting tension, and conducting post-replacement checks, you ensure smooth operation. Regular maintenance, such as cleaning, lubrication, and inspection for wear, prolongs the chain’s lifespan. Addressing common issues promptly and following troubleshooting tips enhance performance. Stay informed with our guide and keep your pole saw in top condition for optimal results.
Frequently Asked Questions
How often should I replace my pole saw chain?
The frequency of replacing your pole saw chain will depend on several factors, such as how often you use your pole saw and the type of cutting tasks you perform. As a general guideline, it is recommended to replace the chain every 1-2 years or sooner if you notice signs of wear or damage. Regular maintenance, including sharpening the chain and lubricating it, can help extend its lifespan.
Can I sharpen the chain, or should it be replaced?
If your pole saw chain is dull but not damaged, you can sharpen it to restore its cutting performance. However, if the chain is worn, damaged, or has broken links, it is best to replace it with a new chain. Sharpening a worn or damaged chain may not provide satisfactory results and can compromise safety.
What are the signs of a dull chain that needs replacement?
Several signs indicate a dull chain that may need replacement. These signs include decreased cutting performance, difficulty in cutting through branches, excessive vibration, and a chain that requires constant readjustment. If you notice any of these signs, it is best to replace the chain with a new one for optimal cutting performance.
How do I know if the tension on my new chain is correct?
To ensure the correct tension on your new chain, it should lift slightly when pulled up at the middle of the guide bar but not come off the bar. The chain should be taut, but not too tight. Consult your pole saw’s manual for the correct tension specifications and adjust as needed.
How to tighten the chain on a black and decker pole saw?
To tighten the chain on your Black and Decker pole saw, simply adjust the tension screws clockwise until the chain sits snugly on the bar. Check for proper tension by gently pulling the chain.
How do you change a chain on a pole saw?
To change a chain on a pole saw, begin by disconnecting the power source, removing the chain guard, releasing tension, and replacing the old chain with a new one. Correctly place and adjust the tension of the new chain before reattaching the guard for safety.
When should I replace my pole saw chain?
A pole saw chain should be replaced when it becomes dull, damaged, or worn out. Signs include difficulty in cutting or excessive vibration. Regularly inspecting the chain for wear and tear is key to ensuring optimal performance.
How to tighten a black and decker chainsaw?
To tighten a Black and Decker chainsaw, locate the tensioning screw near the guide bar. Turn it clockwise to increase tension until the chain fits snugly on the bar but can still be moved easily by hand.
What are the steps to replace the chain on a Black and Decker pole saw?
To replace the chain on a Black and Decker pole saw, follow these steps: Identify the model, prioritize safety measures, gather required tools, remove the old chain by disconnecting power, releasing tension, and installing the new chain correctly.
How often should the chain on a Black and Decker pole saw be replaced?
To maintain optimal performance, chains on Black and Decker pole saws should be replaced when they show signs of wear or damage. Typically, it is recommended to replace the chain after every 50 hours of use for efficient cutting results and safety.
What is the best pole saw?
The best pole saw meets your cutting needs, offers safety features, and is easy to handle. Look for a model with a reliable chain, adjustable length, and comfortable grip for efficient trimming.
What is a pole saw?
A pole saw is a type of chainsaw attached to a long pole, allowing for cutting branches at height safely and efficiently. It’s a versatile tool for tree pruning and maintenance. Understanding its features and usage is crucial for effective and safe operation.
6” Chainsaw or Reciprocating Saw for Tree Branches?
When choosing between a 6” chainsaw or reciprocating saw for tree branches, consider the branch size and cutting precision needed. A chainsaw is great for larger branches, while a reciprocating saw offers more control for smaller cuts.
Wanna guess the most common saw in for repairs?
The most common saw in need of repairs is the Black and Decker Pole Saw. Understanding its maintenance needs will save you time and effort. Proper care and replacement of its chain are essential for optimal performance.
How do you turn off the fuel supply to a chain saw?
To turn off the fuel supply to a chain saw, locate the fuel tank cap and twist it counterclockwise until it detaches. Once removed, the fuel supply will be cut off. Remember to perform this action in a well-ventilated area to prevent any potential accidents.
What is your opinion of your battery powered chain saw?
Get insights on battery powered chain saws. Discuss efficiency, convenience, and maintenance compared to corded models. Share experiences with power, portability, and eco-friendliness.

